Pages

Showing posts with label Card. Show all posts

Wednesday, May 4, 2016

pretty little pink number

Morning Ladies
Today I whipped up this pretty little pink number,
with Magnolia Lane
Take some white cardstock, run it through your machine, using the lovely Petite & Tied Together embossing folder

Add a little strip of , tying a 2nd piece to make a bow, the Pink Decorative lace ribbon  is attached with double sides tape


Magnolia Frame cut a set in pink


Magnolia Frame cut a 2nd frame this time, we will be using the centre piece


Here I've placed the pattern paper centre, back into the centre of the pink frame,
placing the words from the frame set, in the middle


Over the cross points of the embossed card, I placed white pearls


Have fun with these lovely product


Magnolia Lane
Couture Creations
Stay Safe and Enjoy Your Day


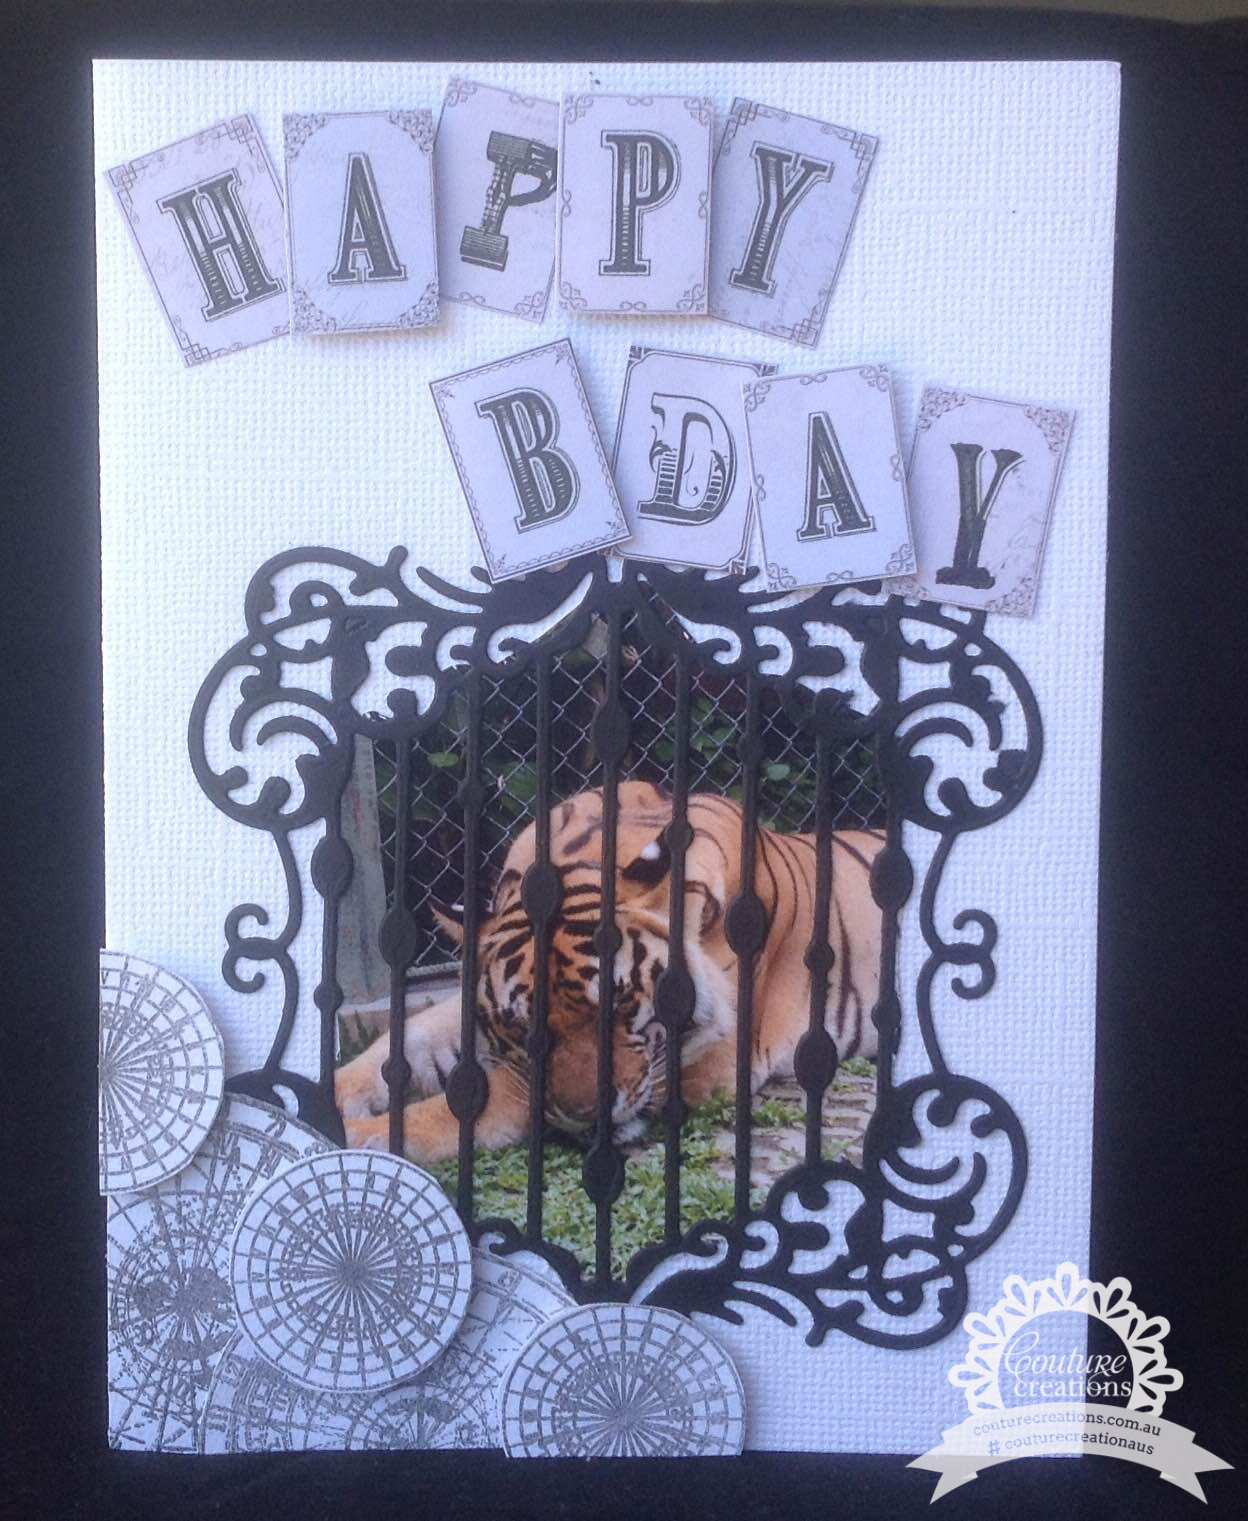
Happy Birhtday "TIGER"

Good morning Ladies
Welcome to April, and my first post of the month
 
Today I've made a quick card, using Magnolia Lane products


First I cut one of Waterfall Frame, which I then added a picture behind it.
 
 
Timeless Garden Stamp set, I stamped 2 of the large circle, and 3 of the small circle,
and cut them out, these I layered with foam tape, in a cluster


Form the 6x6 paper pad, I cut letters from the alpha sheet, to  create a title

 
 every 2nd letter was raised using foam tape
 
 
That's it ladies, have fun with this quick one
 
 
Magnolia Lane


Stay safe and Enjoy your day


Thursday, October 22, 2015

Explore, Dream, Wish

Hi all, and welcome to October.
Today I'm sharing a little card I whipped up, using
 
 
 Here I used a 6x6 Hearts Ease Pattern Paper, which I randomly stamped the small pocket watch stamp over
 
 
 Take the large Pocket Watch and Hour Glass, stamp it onto white cardstock and then cut them out, I raised these with 3D foam dots, the our Hour Glasses 3D dots were doubled up, to make it a little higher than the Watch.
 
 
 Using the Words from the Stamp set, I created my title
  
 
 Have fun with these super stamp
 
Couture Creations Product used 
 
 
CO723780   3D Foam Dots
 
Stay Safe and Enjoy Your Day


Wednesday, September 2, 2015

Perfectly Petite Card

Welcome to September.
Today we're having a look at the new
today I've made a simple, but elegant.

Here we go


First off all I started with a pieces of pattern paper from the Hearts Ease 12x12 Pad,  
cut it about 1 1/2" smaller then the front of your card,
 then using the Couture Creation Corner Punch, round the two corners a the card opening, round the corners on the card also, adhere to your card front with the Turbo Glue Pen, splitting the pattern paper to the top and bottom, choose another pattern paper to fill the gap.


Now cut 2 of the Perfectly Petite Doily SO LACE , and cut them in half, place the halves along the top and bottom of the added stip in the centre of your card.
(to cover the joins, simple tape some ribbon over them)
 
 
 On to make our card centre, from the Perfectly Petite doily, I cut one Ebony Doily ,and 3 GRAMOUR & GRACE Doily, from this die cut, I have cut out the flower centres, these will layered together, spritz and bent inward, to form the flower, which I have glued on to the centre of doily
.
 
Finsihed flower, here I added the Butterfly Flourish 1, from Secrect Gardens collection, I used the small two way glue pen around the outer edge of   doily, and sprinkled a little glitter, for that touch of sprakle, to this project
 
 
 All done
 
Couture Creations product used
 
Perfectly Petite Doily
 
Secret Garden
 
Pattern Paper
or


Stay Safe and Enjoy your Day
http://lesa-countrygirlatheart.blogspot.com.au/


Stay Safe and Enjoy Your Day


Tuesday, July 21, 2015

Christmas in July

A very Merry July Christmas to all,
Welcome to my first Christmas card of the year, today it all about
Couture Creations Christmas Eve die and Christmas Emporium paper collections


I chose 3 contrasting pattern papers from Christmas Emporium range,
which I have torn along all sides all a little smaller than the other
 
 
Here I cut cardstock, to fit behind the poker dot and greeting paper, using my non stick scissors to distress all the edges

 
From some metallic cardstock, I cut one each of the Hanging Ornaments and Be Merry,
both from Christmas Eve
 
 
Here I cut 2 of Vintage Rose Collection  Daffodil Spray, and cut of the daffodil end,
keeping the long flourish end
 
 
After layering the first pattern paper, cardstock and 2nd pattern paper, using the Turbo Glue Pen, place Hanging Ornaments, to the bottom of your card 
 
 
Glue the next 2 layers together, place 3D foam dots, behind the blue cardstock, to raise this level, I added some 2mm Gemstones  Amethyst, to the Christmas Eve Die  Hanging Ornaments for a touch of sparkle (my new favourite thing)
 
 
Here I added some 2mm Gemstones  Amethyst, the Be Merry die cut,
which I placed towards the top right hand corner


Placing the 2 Vintage Rose Collection  Daffodil Spray cut offs behind, 3 spritzed English roses

 
Here I pulled the centre out of a larger English Rose, to make the flower smaller,
to fit the size of my card


Now I hope your enjoy this quick card, but most of all have fun with it
 
Couture Creations Products used
CO721957   15 x 15 Cutting Mat
CO723780   3D Foam Dot
CO721954   Precision LED Tweezers
 
 Stay Safe and Enjoy Your Day
 
 http://lesa-countrygirlatheart.blogspot.com.au/


Friday, July 3, 2015

Discover Hearts Ease in July

Hello Ladies, welcome to my 2nd July post
Today I'm having a play with Couture Creations Hearts Ease Embossing folder and a couple of old favourites for the Van Roe Collection
This is a quick card, so here we go


first cuts a piece of cardstock to suit you card size, making sure it just a little than the base card itself, place the piece into the Hearts Ease Words 5x7 Folder, and run it through you machine


cut 2 pieces of cardstock and one of Hearts Ease Pattern Paper from the 6x6 pad, into 1" strips all slightly smaller than each other, layer these pieces slightly over each,
 use the Turbo Glue Pen to do this,


From the Van Roe Collection, I've chosen the Sign Post and Discover Dies, cutting out one of each, here I also simply cut of the smaller sizes, Square nestting dies, using one as a mat,
attaching the Sign Post and Discover, to the top layer, place over last strip as shown in main picture.
Mounting the Square on 3D foam tape, adds a little demenstion to the card.


To finish off I add a little ribbon, attaching with 6mm Double Sided Tape.
 Hope you like this very quick, simple card


Couture Creations Product Used
CO723729   Van Roe SIGN POST
CO723735   Van Roe DISCOVER
CO724389   Turbo Glue Pen
CO721985   Double Sided Tape 6mm
CO723780   3D Foam Dots
Stay Safe and Enjoy Your Day
http://lesa-countrygirlatheart.blogspot.com.au/ 
 

Thursday, June 25, 2015

Thanks

Thanks ladies for pop in today
I have a quick card for you, using
So off we go


first I have cut a number of the smallest die, from Everyday Essentials   Mini Flowers 1, and just run an ink pad over some of the tips, spritz with water, and bend in the spikey petals in, set a side to dry.


Use the Thanks Die from, the Everyday Essentials  Script - Thanks, cut one and place it on you home made banner.
 
 
Take the flourish form Elegant Card Cuts Collection  Malvoisie Corners , cut one, placing it at the bottom left corner, this is were the flower spray will start
 
add a little bling, to the flourish and the title, using the Couture Creations 2mm Gem Stones.

Patter paper s from the new Heart Ease Paper Pad 12 x12
 
Once you have all your elements, arrange to suite your style, and your done,
hope you have ago, but most of all have fun 


 Stay Safe and Enjoy Your Day

http://lesa-countrygirlatheart.blogspot.com.au/

Tuesday, March 24, 2015

Adventure and Couture Creations

Hello Ladies
Welcome to another page by myself and Couture Creations, today I'm having a little fun with the New Kalini Collection and Elegant Card Cuts


 Dies I've used in this project 


Flowers were made with Kalini Falling Blossoms, cutting 1 of each size, then layeringf them, using a little 2 way glue pen between each layer, and cut 3 of Kalini Sharp Flower, layer and glue these also, spritz with water, and bend petals to form your shapes, place a Self Adhesive Gemstone - Crystal in the centre to add a little bling

Below Close up of flowers


Here I added the Flourish from Elegant Card Cuts - Coteaux Curls, popping on a few of the new 2mm Gemstones - Crystal for a little sparkle


Here I cut out 2 of the Kalini Picket Fence joining the to made a border along the bottom of my photo, add from the Kalini Collection Life Is Beautiful, using the 2mm Gemstone as my i dots


Cut 1 of the Kalini Corner and I placed it over one of the corners of my photo


New Couture Creations Product used

Kalini Collection
 
Elegant Card Cuts
 
GemStones 
 
Premium Adhesive


Other Couture Creations product used
 
CO723816 Craft Glue Spots
CO723817 3D Glue Spots
CO723815 Mini Glue Spots

                Stay Safe and Enjoy Your Day
http://lesa-countrygirlatheart.blogspot.com.au/