

Monday, September 14, 2015
Thursday, September 10, 2015

Monday, September 7, 2015
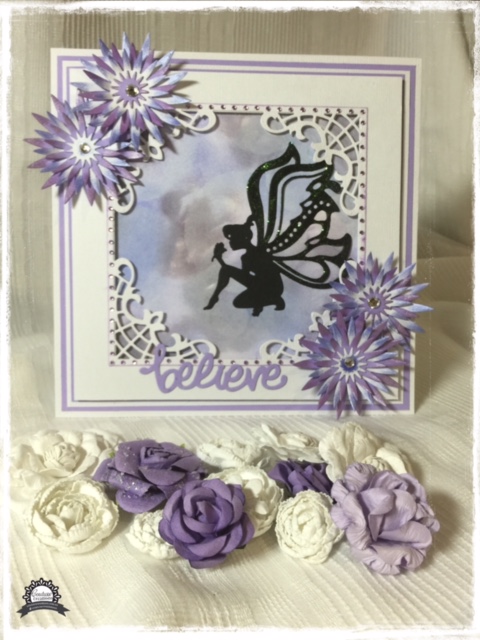
Wednesday, September 2, 2015
Perfectly Petite Card
Welcome to September.
Today we're having a look at the new
today I've made a simple, but elegant.
Here we go

 On to make our card centre, from the Perfectly Petite doily, I cut one Ebony Doily ,and 3 GRAMOUR & GRACE Doily, from this die cut, I have cut out the flower centres, these will layered together, spritz and bent inward, to form the flower, which I have glued on to the centre of doily
.


Stay Safe and Enjoy your Day

Stay Safe and Enjoy Your Day
Here we go

First off all I started with a pieces of pattern paper from the Hearts Ease 12x12 Pad,
cut it about 1 1/2" smaller then the front of your card,
then using the Couture Creation Corner Punch, round the two corners a the card opening, round the corners on the card also, adhere to your card front with the Turbo Glue Pen, splitting the pattern paper to the top and bottom, choose another pattern paper to fill the gap.

Now cut 2 of the Perfectly Petite Doily SO LACE , and cut them in half, place the halves along the top and bottom of the added stip in the centre of your card.
(to cover the joins, simple tape some ribbon over them)

.

Finsihed flower, here I added the Butterfly Flourish 1, from Secrect Gardens collection, I used the small two way glue pen around the outer edge of doily, and sprinkled a little glitter, for that touch of sprakle, to this project

All done
Couture Creations product used
Perfectly Petite Doily
Secret Garden
Pattern Paper
or
Stay Safe and Enjoy your Day
Tuesday, September 1, 2015

Tuesday, August 18, 2015
Stunning
Hello Again
Today I'm sharing another layout using the lovely,
Couture Creations Secret Graden Collection of Dies.
So lets go

These are a quick photo of the dies used in the project, less the sign post

Below are 2 different flowers I've made with the same Chevron Bloom Die,
the first one I cut 3 of the flowers, inked the edgse, place a spot of glue in the centres, using the
Turbo Glue Pen, after the glue has dried, spritz with water, scrunch each layer in to the centre, spritz between layers, sit aside to dry, then gently open up your flower as much as you like
Turbo Glue Pen, after the glue has dried, spritz with water, scrunch each layer in to the centre, spritz between layers, sit aside to dry, then gently open up your flower as much as you like

2nd flower, cut 3 Chevron Blooms, and 3 each of the Layered Bloom die,
Again glue the layers of Chevron together, spritz, pinch each petal and fold up to the centre, then do the same with the Layered Bloom, top 3 layer, the bottom 3 just squeeze the in, place some glue in the centre of the Chevron, and add the Layered Bloom to the centre

Finished flower, just add some 2mm Gemstone to the middle, and touch the edges with
some Glitzn' Glamour

To make the bordered edge on the layout, I cut the Picket Fance out several times, in 3 different colours, then simply laid them over each other

Finished flower, here I've used the flourish, from the Butterfly Flourish Die Set, behind the flowers along with a favourate form the Everyday Essentials collection Strawberry Leaf


Here I cut one each of the 3 Letterboxes, in shades of purple, and again 3 in back, where I cut the roof of each one, and placed the over the purple Letterboxes, adding a few 2mm Crytal Gemstone, for that touch of bling, I also cut one of the birds from the Chirp Chirp die and add him to one of the Letterboxes

Using the Layered Buttetfly, in pinks and purple, I've scattered them over my layout, in doubles and singles, to keep the wings up, I use 3d Foan Dots, again for a liitle bling, add 2mm Gemstone to the body of the butterflies

And finally I've place a little Glitzn' Glamour here and there
So when you have all your ellements done, place them on your layout, or card to suit your style
hope you enjoy these, but most of all have fun
Couture Creations Products used
CO724278 BUTTERFLY FLOURISH
CO724272 LAYERED BUTTERFLY
CO724268 CHIRP CHIRP
CO724211 LAYERED BLOOM
CO724274 POINTY FENCE
CO724275 3 LETTERBOXES
CO724277 CHEVRON BLOOM
CO724115 Everyday Essentials STRAWBERRY LEAF
CO723818 Quick Release Die Paper
CO721957 15 x 15 Cutting Mat
Stay Stay and Enjoy You Day
Wednesday, August 5, 2015
Special Memories
Hello Ladies and welcome August
Come with me today on a journey, to Couture Creations Secret Garden Collection, along the way we'll visit with a couple oldies but goodies, Everyday Essentials, Kalini,
and Sercet Treasures collections.
and Sercet Treasures collections.
So off we go


From the Kalini Collection, cut a full set of Gears 1 and Gears 2, from white cardstock, randomly bush on some guesso, allow it to dry, and them spritz with 2 or 3 different inks, this will help them look a little rustic


The Kalini Picket Fence, I cut 2 of these and raised them with small piece of foam tape, and placed it along the front of my photo, also from the Secret Treasures collection, I cut a set of Bird Song die, placing them on the fence and around the gear cluster, topping the birds with DM
 Using the 6x6 Hearts Ease paper pad, choose 3 sheets, cutting form each one,
a set of the Kalini Falling Blossom's, Layer each set using the Turbo Glue Pen, once dry, spritz with water and bend or pinch each petal to get 3 different flower from the same die, adding a touch of bling to the centres, with Seaspray Gem stones

Cut 3 of the Everyday Essentials Classic Leaf, spritz with Water, and then press into the palm of your hand, this will give the leaf shape.
use one Kalini Stained Glass Butterfly, and a set of Everyday Essentials Edith and Baby, here I've layered all 3 to create a super butterfly, again using the seaspray gems on the body

From the Secret Garden Collection cut one of the Layered Butterfly,
again adding Seaspray Gems to the body

Also from Secret Garden cut a few Butterfly Flourish, here I've used the butterfly as the dot on my i, the rest are just short cuts of the flourish which I've used with my flower and gear clusters


Place ellements on your layout to suit you style, and have fun, but most of all enjoy creating

a set of the Kalini Falling Blossom's, Layer each set using the Turbo Glue Pen, once dry, spritz with water and bend or pinch each petal to get 3 different flower from the same die, adding a touch of bling to the centres, with Seaspray Gem stones

Cut 3 of the Everyday Essentials Classic Leaf, spritz with Water, and then press into the palm of your hand, this will give the leaf shape.
use one Kalini Stained Glass Butterfly, and a set of Everyday Essentials Edith and Baby, here I've layered all 3 to create a super butterfly, again using the seaspray gems on the body

From the Secret Garden Collection cut one of the Layered Butterfly,
again adding Seaspray Gems to the body

Also from Secret Garden cut a few Butterfly Flourish, here I've used the butterfly as the dot on my i, the rest are just short cuts of the flourish which I've used with my flower and gear clusters


Place ellements on your layout to suit you style, and have fun, but most of all enjoy creating
Couture Crewations Products used
CO724116 Everyday Essentials EDITH and BABY
CO724111 Everyday Essentials CLASSIC LEAF
CO723522 Secret Treasures BIRD SONG
CO724250 Kalkini STAINED GLASS BUTTERFLY
CO727425 Kalini FALLING BLOOSOMS
CO725255 Kalini PICKET FANCE
CO724262 Kalini GEARS 1
CO724261 Kalini GEARS 2
CO724278 Secret Garden BUTTERFLY FLOURISH
CO724272 Secret Garden LAYERED BUTTERFLY
CO721989 Gem Stone SEASPRAY
CO721965 3d Foam Tape
CO724389 Turbo Glue Pen
Stay Safe and Enjoy Your Day
Subscribe to:
Posts (Atom)